How to Create an Assessment Using Google Forms
Introduction
Providing assessments has always been an essential part of education. It is a great way of testing the knowledge of our students.
However, creating an assessment can be time-consuming and challenging. Fortunately, technology has made it easier for teachers to create and correct assessments, with the help of Google Forms.
Google Forms is a free tool that allows users to create online forms, questionnaires, surveys, and quizzes. Creating these assessments using Google Forms is straightforward, and in this blog post, we will help you understand how to easily create an assessment using Google Forms.
Step 1: Open Google Forms and Choose a Template
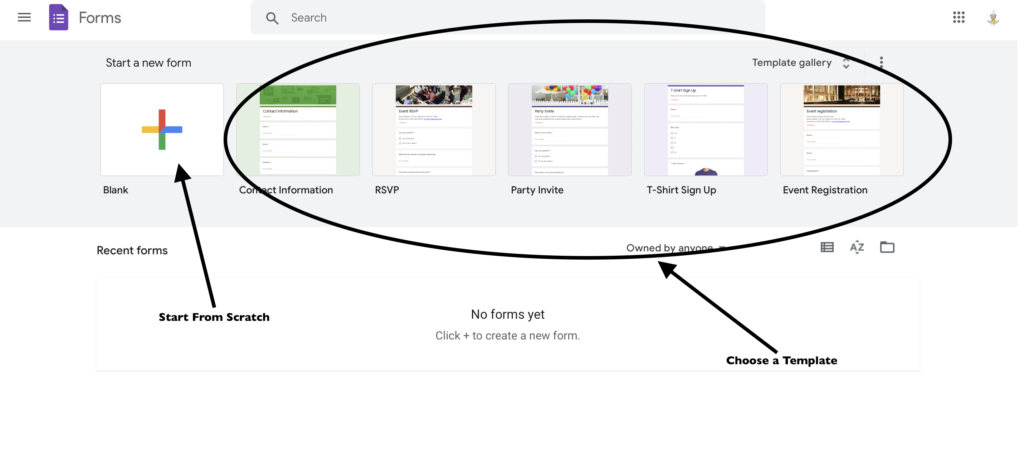
First, open Google Forms. Next choose to start with a blank template by clicking on the plus sign (+) in the upper left corner.
You can also choose to use one of Google’s many templates. Templates can be a huge time saver since they are pre-made, and you can just change the questions according to your needs. If you decide to start from scratch, you can select “Blank” and add the title and description of your quiz.
Step 2: Make the Google Form a Quiz
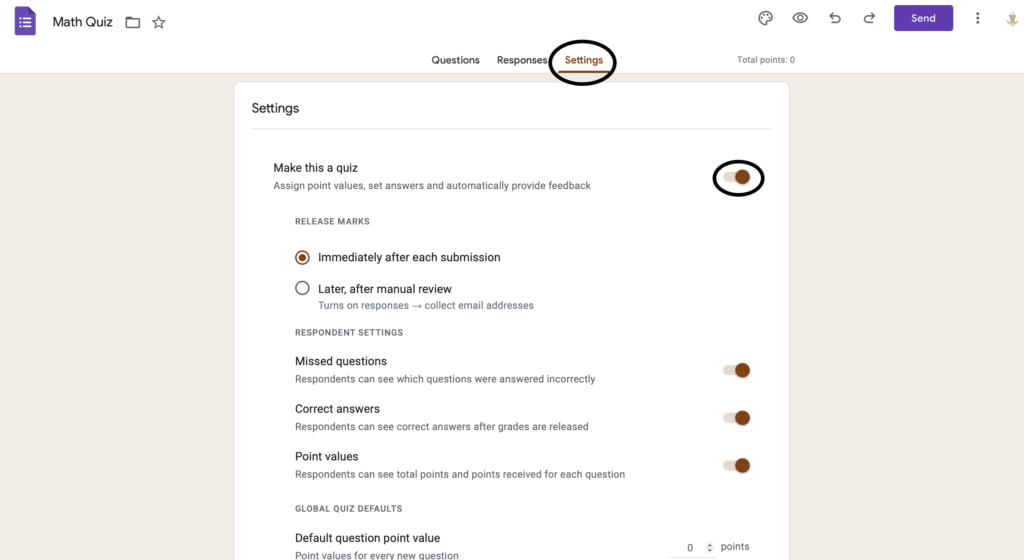
Once you have created your new form or selected your template, it is time to convert your Google form to a quiz in order to assign a grade.
Click on the setting option right above the form. Once on the setting page, turn on the quiz option. Once clicked, adjust the settings as you see fit.
Adjustments can include when students receive their grades, how often they can take the quiz, providing feedback on the incorrect question, and much more!
Step 3: Add Questions and Answers
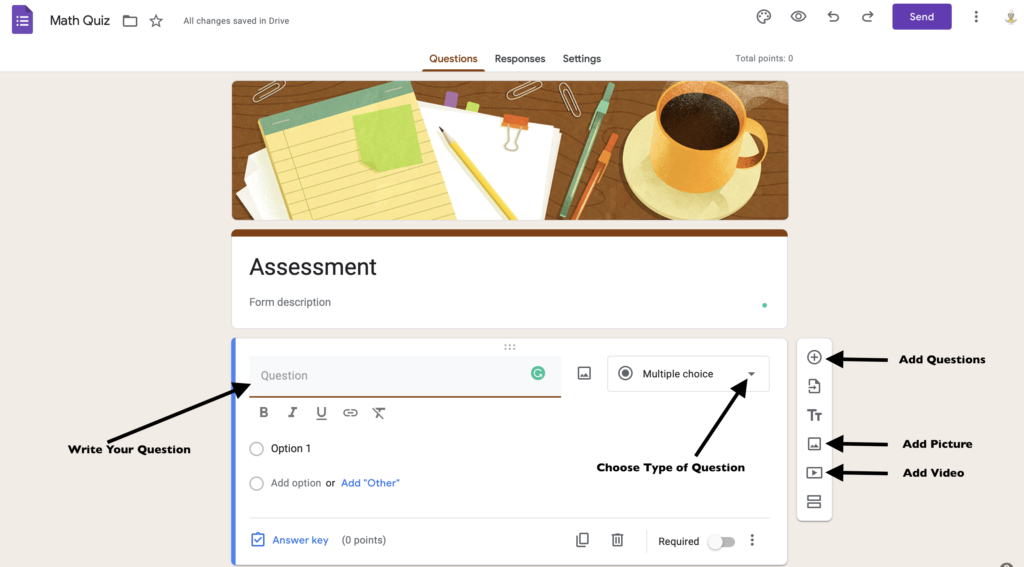
Once you have created your new form or selected your template, it is time to add questions to your assessment. To add a question, click on the plus sign (+) on the right side. You can choose from different question types such as multiple choice, short answer, checkbox, dropdown, and more.
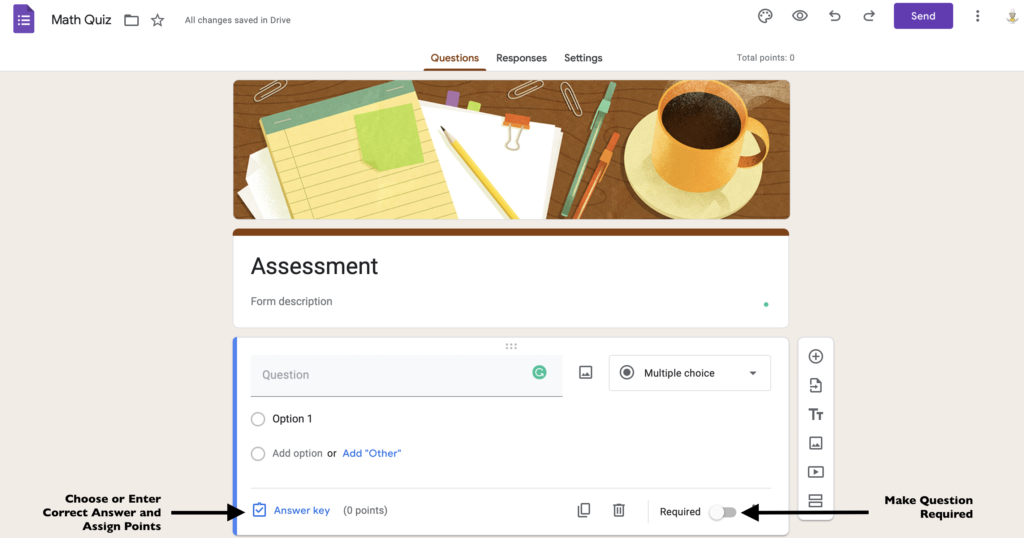
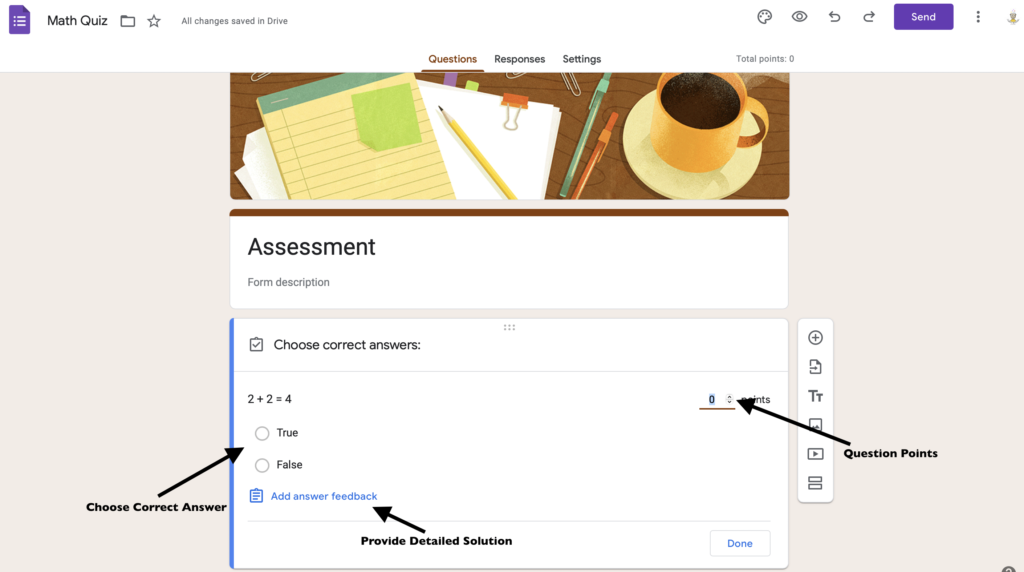
For each question, you can set the required answer, add explanations, and assign point values. You can also add images and videos to make the quiz more interactive and engaging for your students.
Step 4: Customize the Quiz Settings
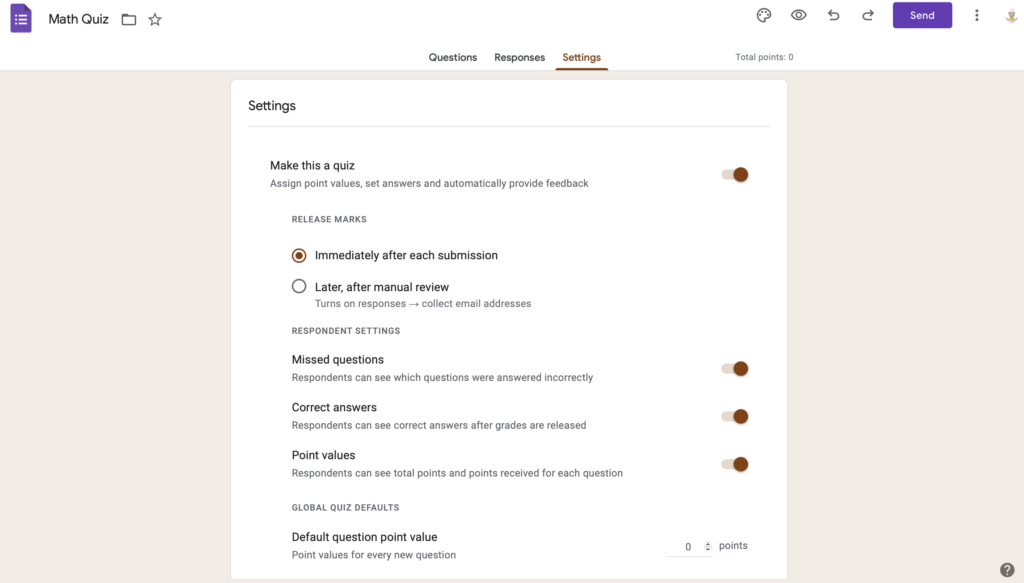
After adding all the questions, you can customize the settings of your quiz. In the “Settings” tab, you can choose to shuffle questions, randomize answers, and set the assessment duration. You can also set the assessment to grade automatically and show students their score and correct answers. Additionally, you can choose whether to collect email addresses or make the quiz anonymous for your students.
Step 5: Share the Quiz with Your Students
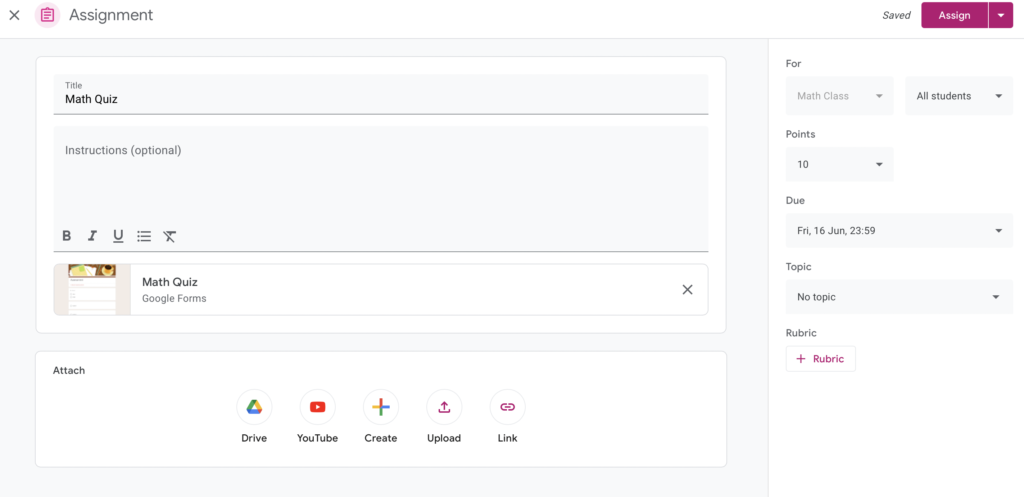
After completing all the necessary settings, it is time to share the assessment with your students. You can share the link to the assessment via email, Google Classroom, or your school’s learning management system.
Students can take the assessment using any device with internet access and submit their answers. Once they have submitted their answers, you can view and grade their responses in the “Responses” tab. You can also download the responses as an Excel spreadsheet for easier tracking.
Step 6: Analyze the Results
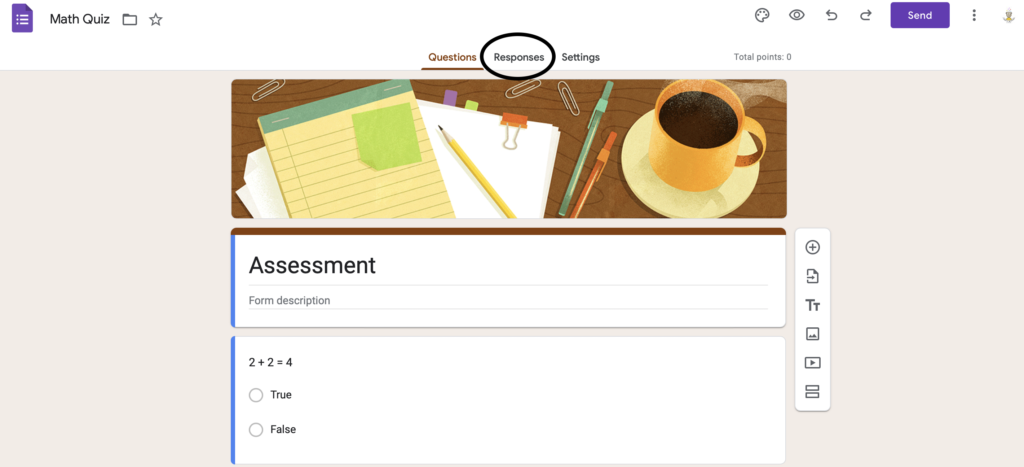
After grading your students’ responses, you can analyze the results using Google Sheets or Forms. Google Forms automatically generates a summary of the results, including the number of responses, average score, and percentage of correct answers.
You can also view the individual responses of each student and read their feedback and comments. This will give you an insight into their understanding of the material and where they may need help.
Conclusion
In conclusion, creating an assessment using Google Forms is an easy and efficient way of assessing your students’ knowledge.
With the step-by-step guide we have provided, you can create a quiz that is customized for your classroom and meets your assessment needs. You can save time and effort by using Google Forms templates and customizing the assessment settings to meet your requirements.
Sharing the assessments with your students is easy and convenient, and analyzing the results will help you understand where your students need help. To learn more about how to share your assessment on Google Classroom read our blog here.
We hope this guide helps you generate assessments that are engaging, informative, and fun for your students.


